Webhook Integration Guide: Thunai App with ServiceNow
To configure ServiceNow to trigger a webhook to Thunai whenever an Incident, Task, Problem, or Change Request is created or updated, follow the steps below:
Step-by-Step Guide
1. Prepare the Webhook in Thunai
Go to:
Thunai Dashboard → Application → MCP Tool
This will redirect you to the Create Custom App page.
-
Click Create
Fill the required fields:
- App Name
- Type: Event-Based
- (Optional: Add Description and Logo)
-
Once created, enable the toggle
Add a Webhook:
- Webhook Name
- Primary Key (mandatory for payload mapping)
- Add Webhook Fields in JSON (based on ServiceNow modules):
{
  "table": "{{table}}",
  "number": "{{number}}",
  "short_description": "{{short_description}}",
  "description": "{{description}}",
  "priority": "{{priority}}",
  "state": "{{state}}",
  "sys_id": "{{sys_id}}",
  "created_on": "{{created_on}}",
  "updated_on": "{{updated_on}}",
  "assigned_to": "{{assigned_to}}",
  "assignment_group": "{{assignment_group}}"
}
After saving, you will get:
- Webhook Name
- Webhook CURL Endpoint
- JSON structure (as above)
2. Create a Webhook Trigger in ServiceNow
Business Rule Setup
Login to ServiceNow and navigate to:
Left Menu Search → Business Rules
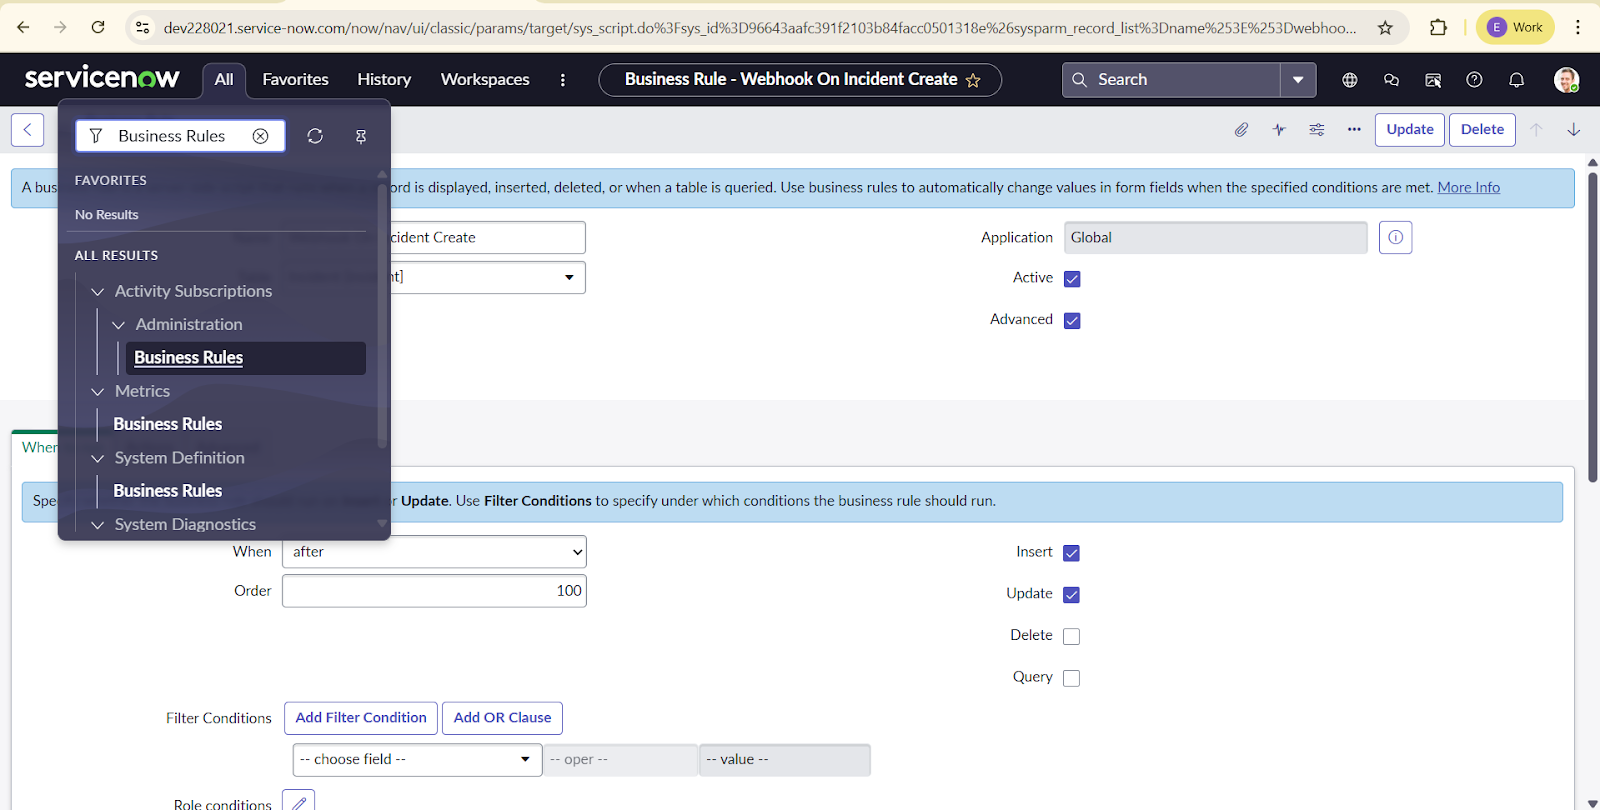
-
Click New
Fill the details:
-
Name: (Example: Thunai Webhook Trigger)
Table Selection:
- Incident → incident
- Task → task
- Problem → problem
-
Change Request → change_request
Enable:
- Active
- Advanced
-
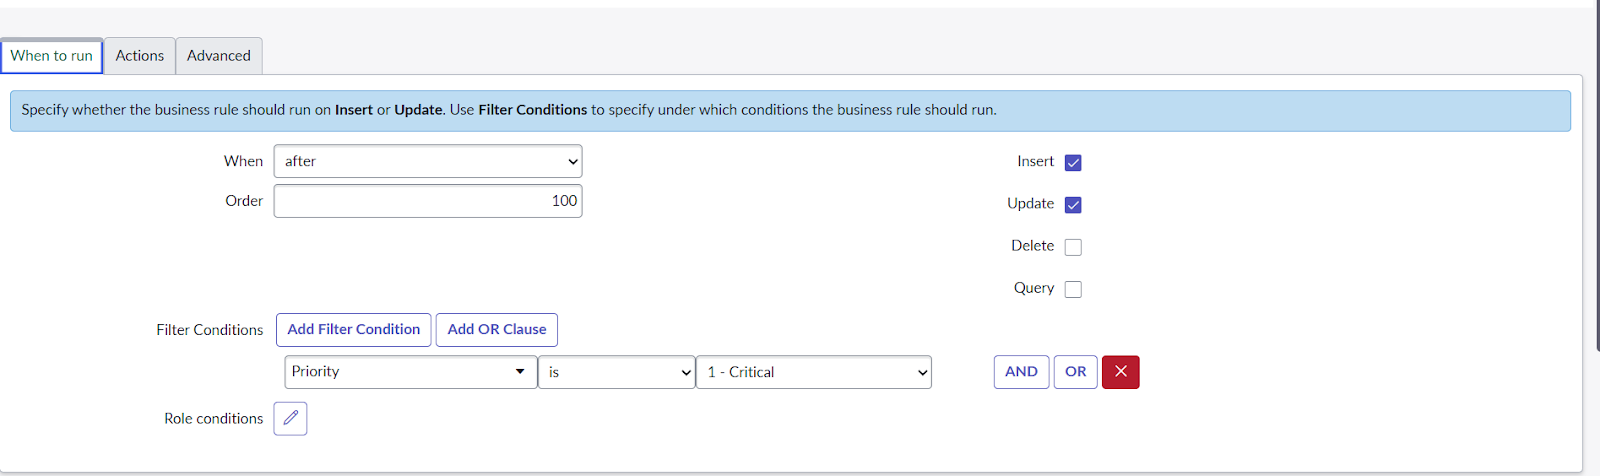
When to Run
-
When: After
Check:
- Insert
- Update
- (Optional) Add conditions (e.g., only for High-Priority items)
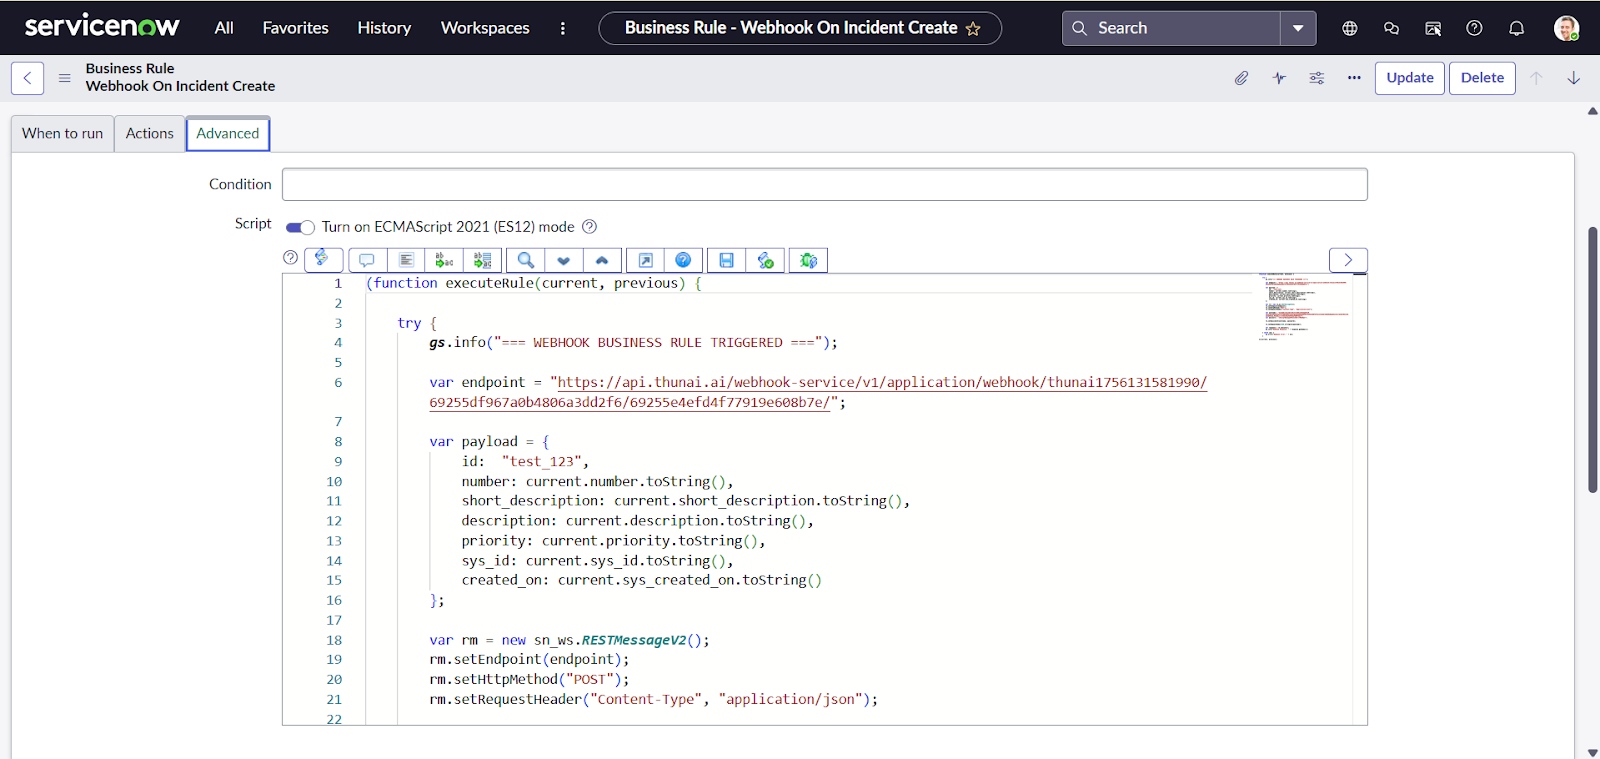
Webhook Script (Advanced Tab)
Paste the script below:
(function executeRule(current, previous) {

    try {
        gs.info("WEBHOOK BUSINESS RULE TRIGGERED");

        var endpoint = "YOUR_WEBHOOK_URL_HERE";

        var payload = {
            table: current.getTableName(),
            number: current.number.toString(),
            short_description: current.short_description.toString(),
            description: current.description.toString(),
            priority: current.priority.toString(),
            state: current.state.toString(),
            sys_id: current.sys_id.toString(),
            created_on: current.sys_created_on.toString(),
            updated_on: current.sys_updated_on.toString(),
            assigned_to: current.assigned_to.getDisplayValue(),
            assignment_group: current.assignment_group.getDisplayValue()
        };

        var rm = new sn_ws.RESTMessageV2();
        rm.setEndpoint(endpoint);
        rm.setHttpMethod("POST");
        rm.setRequestHeader("Content-Type", "application/json");

        // Basic Authentication
        var username = "YOUR_USER_NAME_HERE";
        var password = "YOUR_PASSWORD_HERE";
        rm.setBasicAuth(username, password);

        rm.setRequestBody(JSON.stringify(payload));

        var response = rm.execute();
        gs.info("Webhook Response: " + response.getBody());

    } catch (ex) {
        gs.error("Webhook Error: " + ex);
    }

})(current, previous);
Replace:
YOUR_WEBHOOK_URL_HERE-
Username and Password with Thunai API Auth credentials
(From Thunai Dashboard → Settings → API Keys)
- Click Save
3. Test the Integration
- Create or update a record in ServiceNow based on your chosen table
-
Webhook should automatically trigger
Validate logs from:
- ServiceNow Logs
- Thunai Logs Dashboard
Voice/Chat Agent Workflow Integration
If mapped under Workflow Version 3, then:
- While creating a workflow, select the ServiceNow webhook-enabled application
- When a record is created/updated, Thunai will trigger the agent workflow automatically