Custom Application – MCP Type Setup Guide
Thunai allows you to create MCP Type Custom Applications that can be integrated into your agents’ workflows. These apps help extend functionality by connecting APIs and tools directly into the platform.
Step 1: Create an MCP Type Application
-
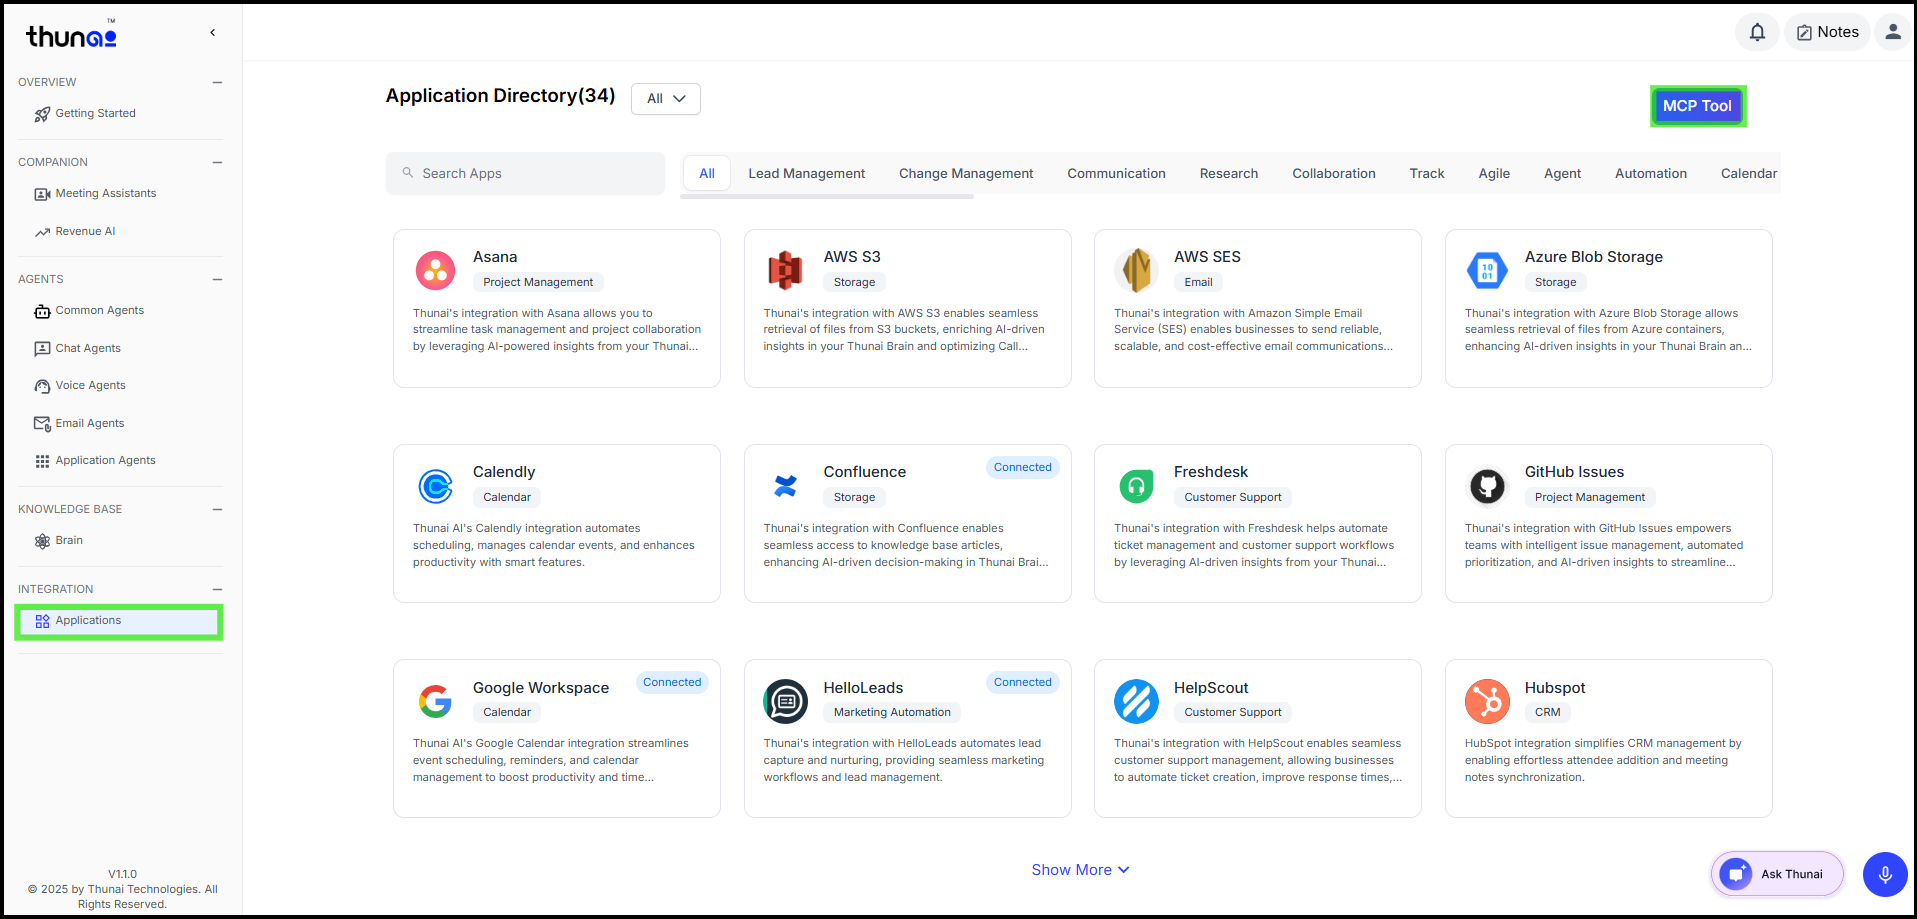
From the left-side menu, click Applications.
Click the MCP Tool button.
-
This will redirect you to the MCP page.
Click Create.
Enter the following details:
- App Name
- Type – Select MCP
- Logo (optional) – Upload a custom logo.
- Description (optional) – Provide details about the app.
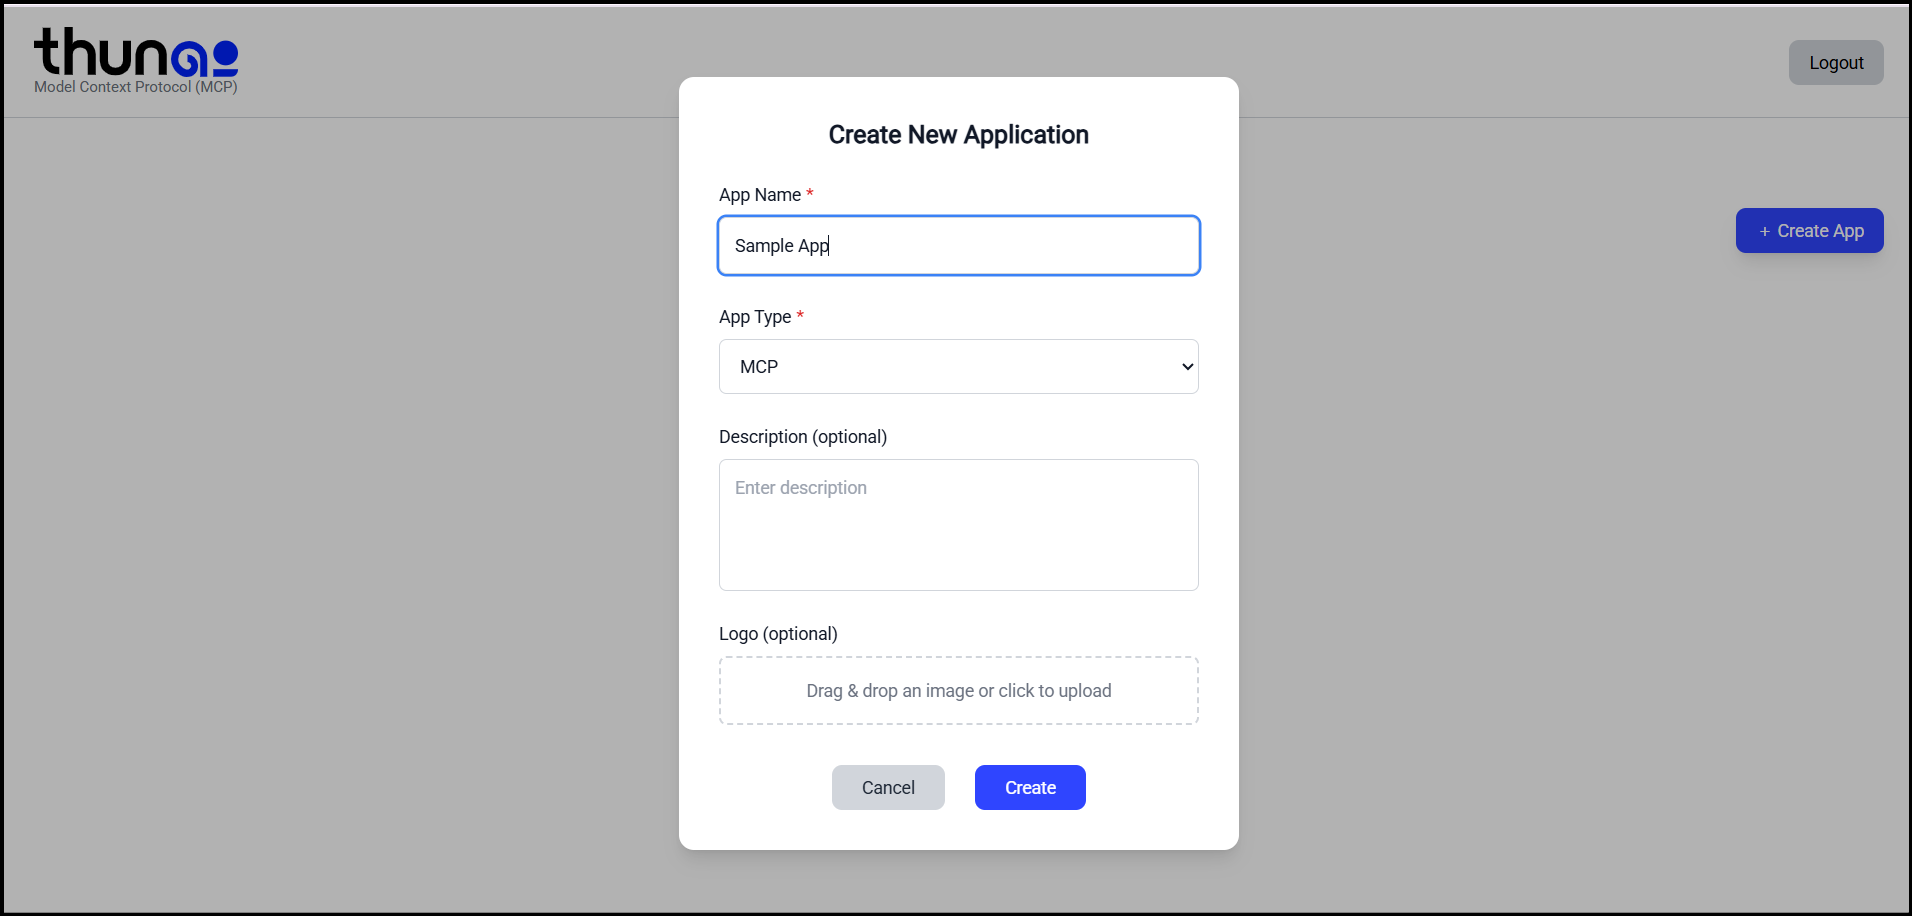
Click Save.
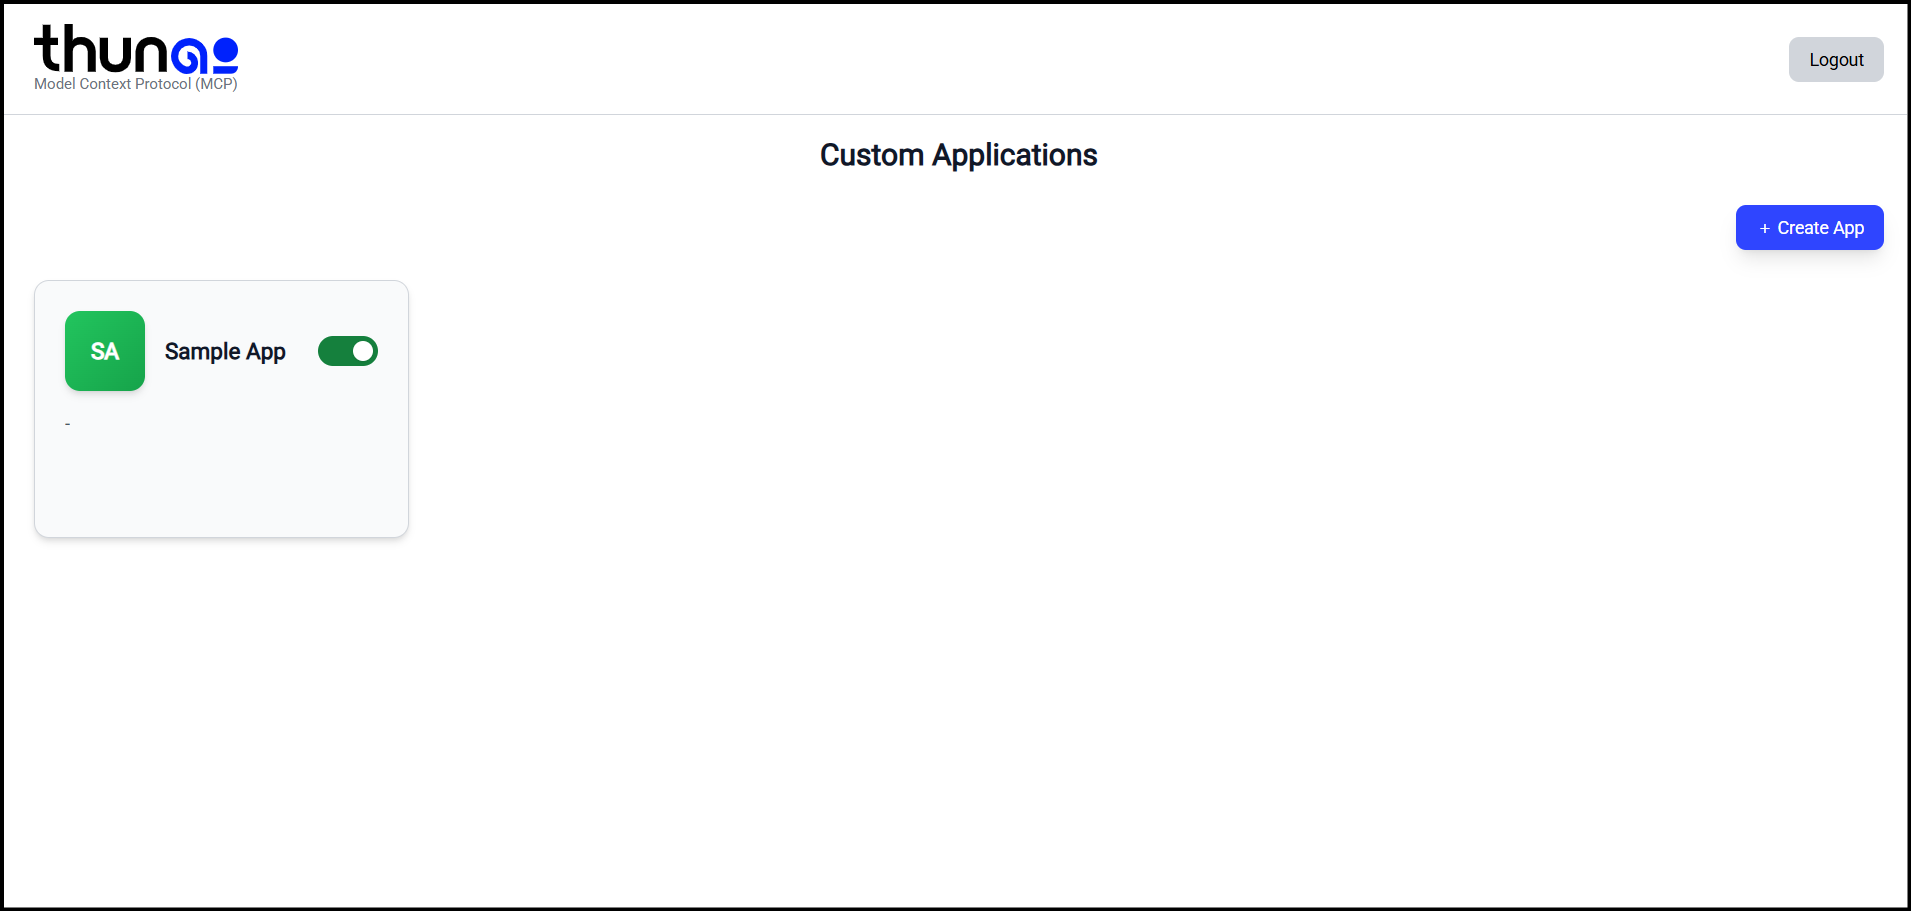
- Your MCP Type application is now created.
Step 2: Add APIs to the MCP Application
- Open your newly created MCP app.
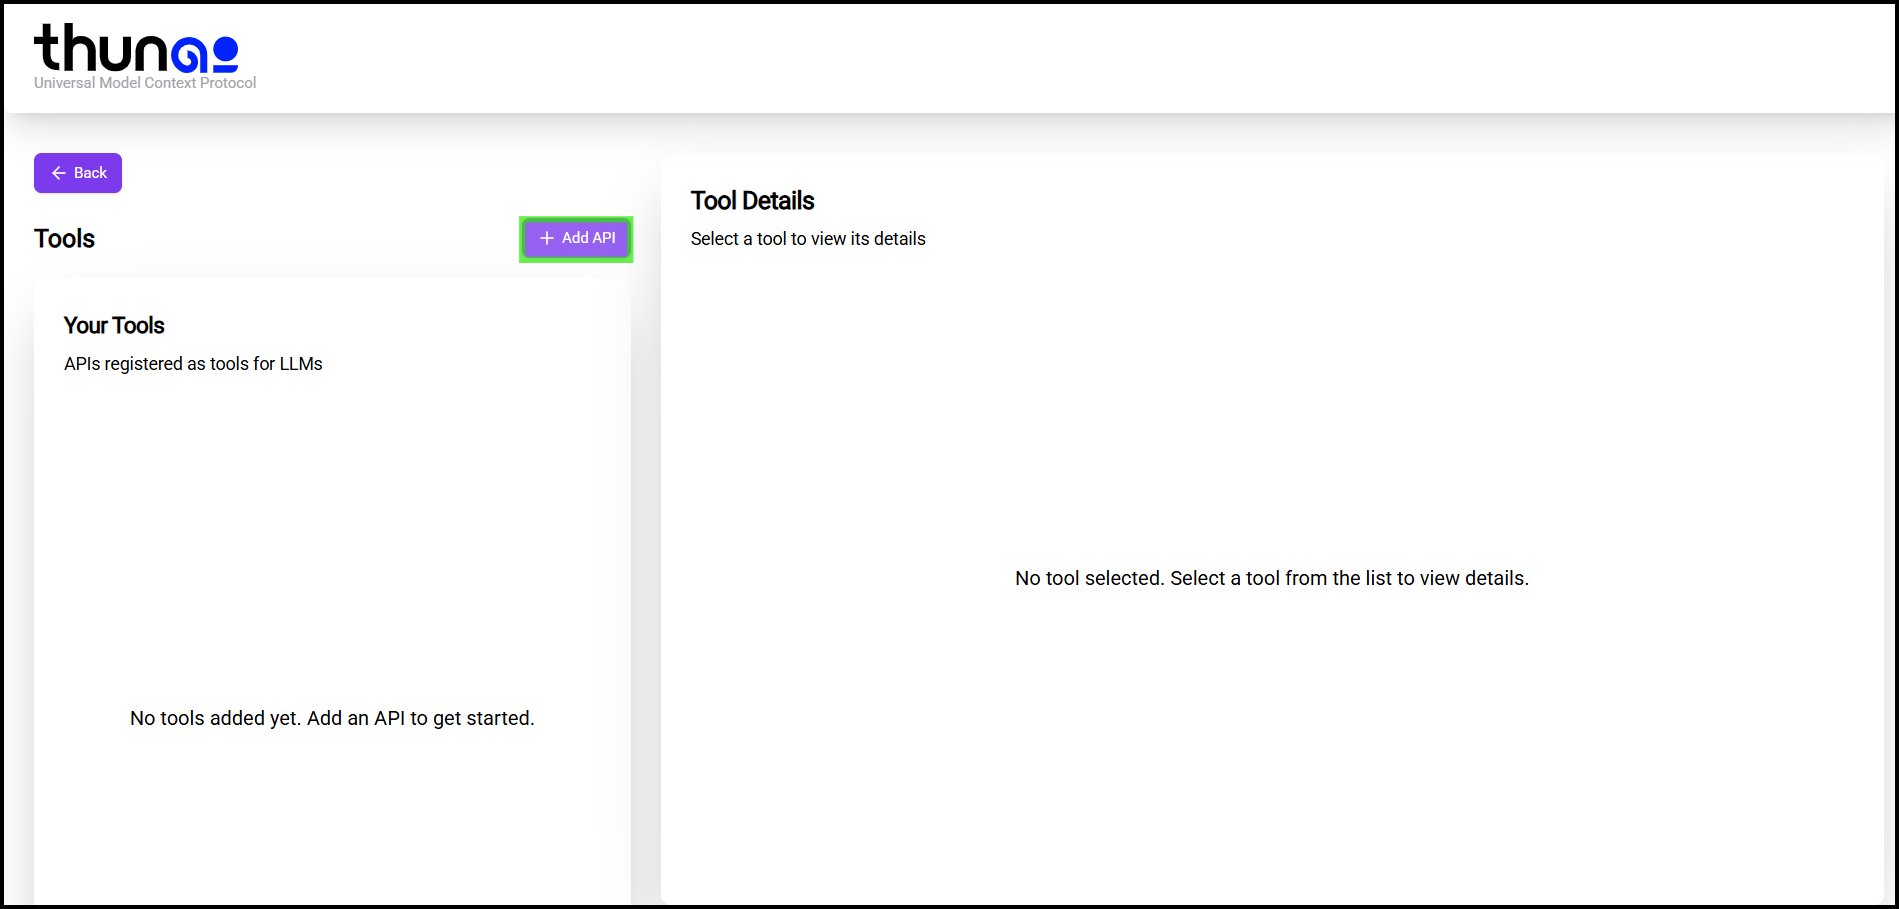
- Under the APIs section, click Add API.
- Fill in the required fields by:
- Uploading the API Configuration File.
Save your changes.

Step 3: Use MCP Apps in Workflows
- Once APIs are added, your MCP Type App can be used as a tool inside agents’ workflows.
- This enables more automation, seamless API calls, and extended integrations.

Use Cases
- Connect external APIs to enhance agent capabilities.
- Automate repetitive tasks by integrating custom tools.
- Extend workflow functionality without modifying the core platform.